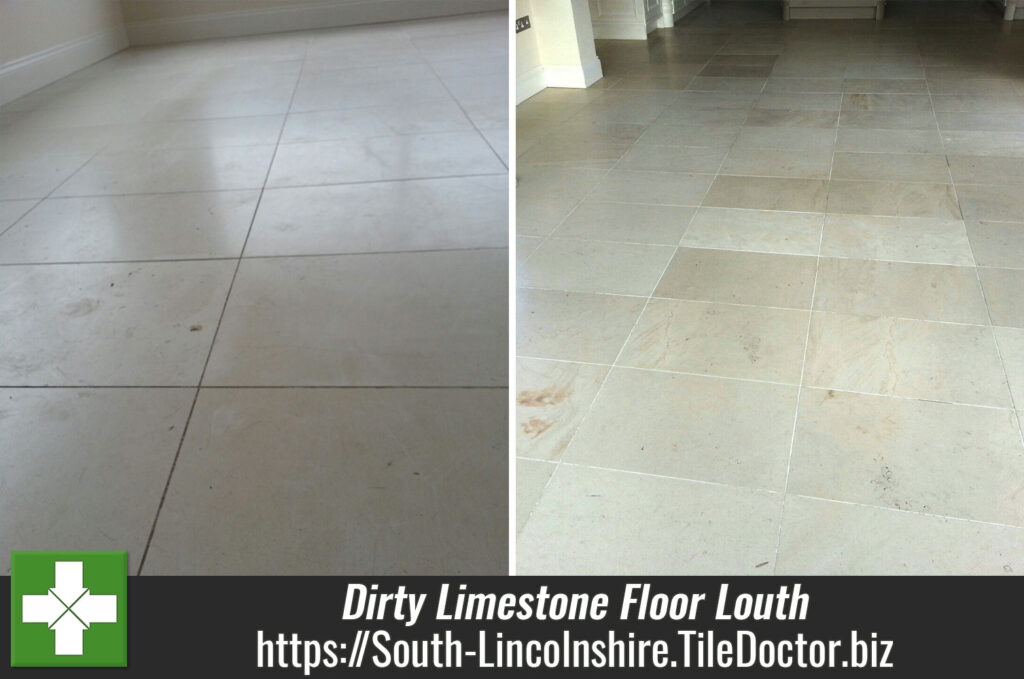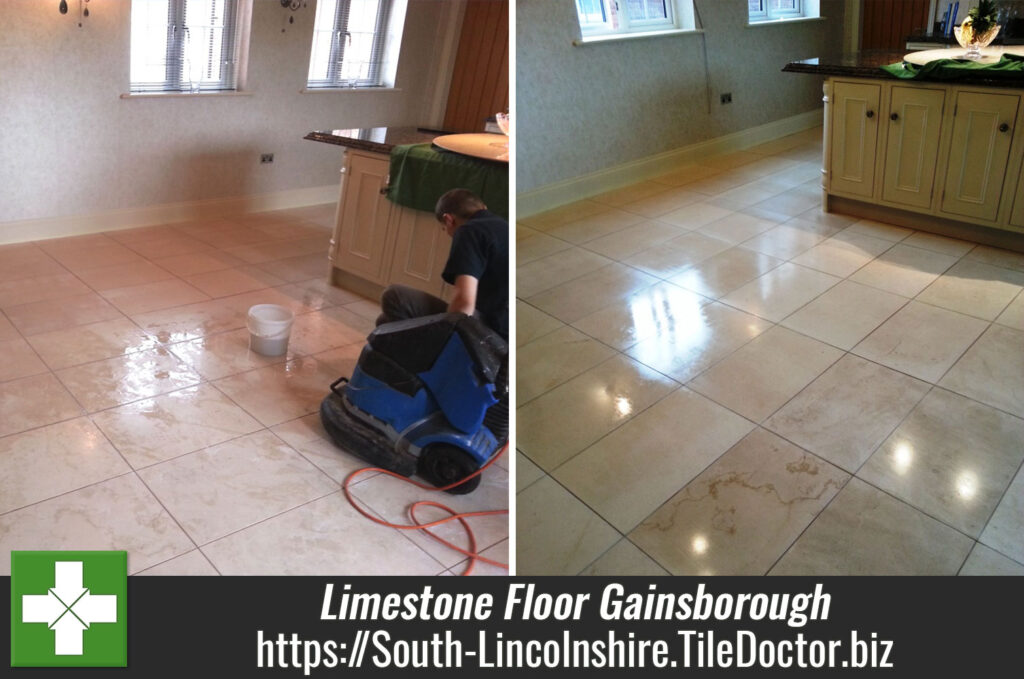
60m2 Limestone floor tiles restored in Gainsborough
This was a large 60m2 Limestone tiled floor installed in the entrance hall and kitchen of a residence in the town of Gainsborough. The Limestone tiles had lost their shine and cracks had appeared in a number of tiles which was due to the floor settling after it had been built, any previous sealer was failing and the tiles were getting very dirty with visible staining.
 |
 |
Burnishing Limestone Tiles
To clean the floor and remove the stains Limestone needs to be stripped back to the original tile with burnishing pads removing the old sealer along the way. To do this a set of diamond encrusted burnishing pads are applied in sequence along with a little water. The pads come is a setup of four and you start with the coarse pad which fitted to a buffing machine running on slow speed, the coarse pad removes old sealers and then you move onto the medium, fine and very fine pads until the Limestone is cleaned and polished again. In-between pads we filled in the cracks that needed attention with Limestone flexible filler which does a great job of hiding the unsightly lines, the burnishing of the tile then makes the filler blend in and become invisible. Once the burnishing was finished the floor was rinsed down with clean water and then left to dry.

Limestone Tile Sealing
On the 2nd day the floor was dry and we applied the two coats of Tile Doctor Colour Grow sealer to the tiles, the sealer fills the pores of the stone making it water and resistant and will protect it from stains in the years to come, this particular sealer has a natural matt finish and as its name suggests add a subtle lift to the natural colours in the stone.
 |
 |
To demonstrate the floor was sealed we carried out a small test in front of the customer where she could choose any tile on which to pour water and simply watch the water form a bead and dance across the tile surface and not mark or be absorbed into the tile in any way. Even after a few minutes it just simply wipes away with no sign of a darker area visible. This shows the seal is doing its job of sealing and protecting the Limestone. She was delighted with the result so much that she is now reconsidering putting the house up for sale and staying there for another year.
Limestone Tiled Floor resurfaced and polished in Gainsborough
60m2 Limestone floor tiles restored in Gainsborough Read More »